Are you looking for something new in your bathroom or kitchen? Do you consider installing new flooring? If you have lots of spare pennies, then perhaps you should try the copper penny flooring. Why not take our spare change and salute the past president of the United States with unique copper penny flooring? It’s a great hands-on project, relatively affordable, beautifully eclectic and did I mention warmly inviting and invigorating with its copper hue? Going well beyond the bathroom and taking over backsplashes in the kitchen and even the fireplace are penny tiles These smart, unassuming and exciting little things can bring in a sudden dash of color and geometric contrast with elegant ease. A penny saved.. is a tile floor!

I found an amazing step by step guide which provides a complete run down on materials, timing and instructions. We did make some small changes such as using only one coat of resin but our surface didn’t need to be kitchen counter-grade. Why not take our spare change and salute the past president of the United States with unique copper penny flooring? It’s a great hands-on project, relatively affordable, beautifully eclectic and did I mention warmly inviting and invigorating with its copper hue?

Things that you have to know about DIY Copper Penny Flooring Made Easy:
Step 1: Make sure to buy enough pennies in advance. Banks only stock around $40 worth of pennies and they are loathe to give them all to one person.
Step 2: Seal off any areas where the resin might leak through. Because it will leak. Eep. If in doubt over a joint, use clear caulk. Definitely, definitely use caulk.
Step 3: Even out the floor. Sand down irregularities and bumps. Fill in the valleys with masonry materials like hydraulic cement. If you have wood based flooring then you’ll want to deal with a joint compound. Either way say goodbye to a tidal wave of unevenness.
Step 4: Clean the runway. Grease? Oil? Dirt? Dust? Banish them away with a mild degreaser detergent, followed by a thorough and detailed rinsing. Let dry. But don’t take a breather. Nope. I warned you this would labor intensive. Start sorting your pennies. Shiny. Dull. A mixture of them, whatever suits your fancy.

Step 5: Sticky side face up, start placing the pennies on your fiberglass squares. Row by row, lined up against the edge, the round ridges touching their fellow Lincoln heads. Keep applying the copper circles on your fiberglass squares until filled up.
Step 6: Using a chalk snap line measure both the length and width of the room snapping your chalk line to form a checkered grid pattern for your cut squares, in sizes either 6”x6” or 12”x12”, in accordance with what you have cut your fiberglass to.
Step 7: Starting in the back of the room apply an epoxy-based clear adhesive with a paintbrush to the inside area of your chalk lined square. Place your copper penny tile in place and firmly press down in the center, apply pressure in all four corners to guarantee maximum adhesive. Moving to the left and right and outward continue to paint a thin layer of your epoxy and firmly placing your tiles down. Allow up to six hours of drying.
Step 8: A sense of humor and patience is a must!
Another 72 hours later, 24 cups of coffee and an entire season of LOST and all those hard earned pennies will look pretty electrifying as your floor. Next time you are offered a penny for your thoughts, pull out your smartphone and proudly share your DIY copper penny floor picture. Be sure to enlarge and zoom in, even going so far as to let them hold the phone in the palm of their hand. Yes, your labor and your thoughts are undeniably worth more than a single penny.

For 69.95 $, Modwalls Real Penny Mosaic available by special order. Please call or email us for more info. You can purchase mosaic penny tile from here.


Here is some inspirations that bring home the beauty of penny tiles. Enjoy!
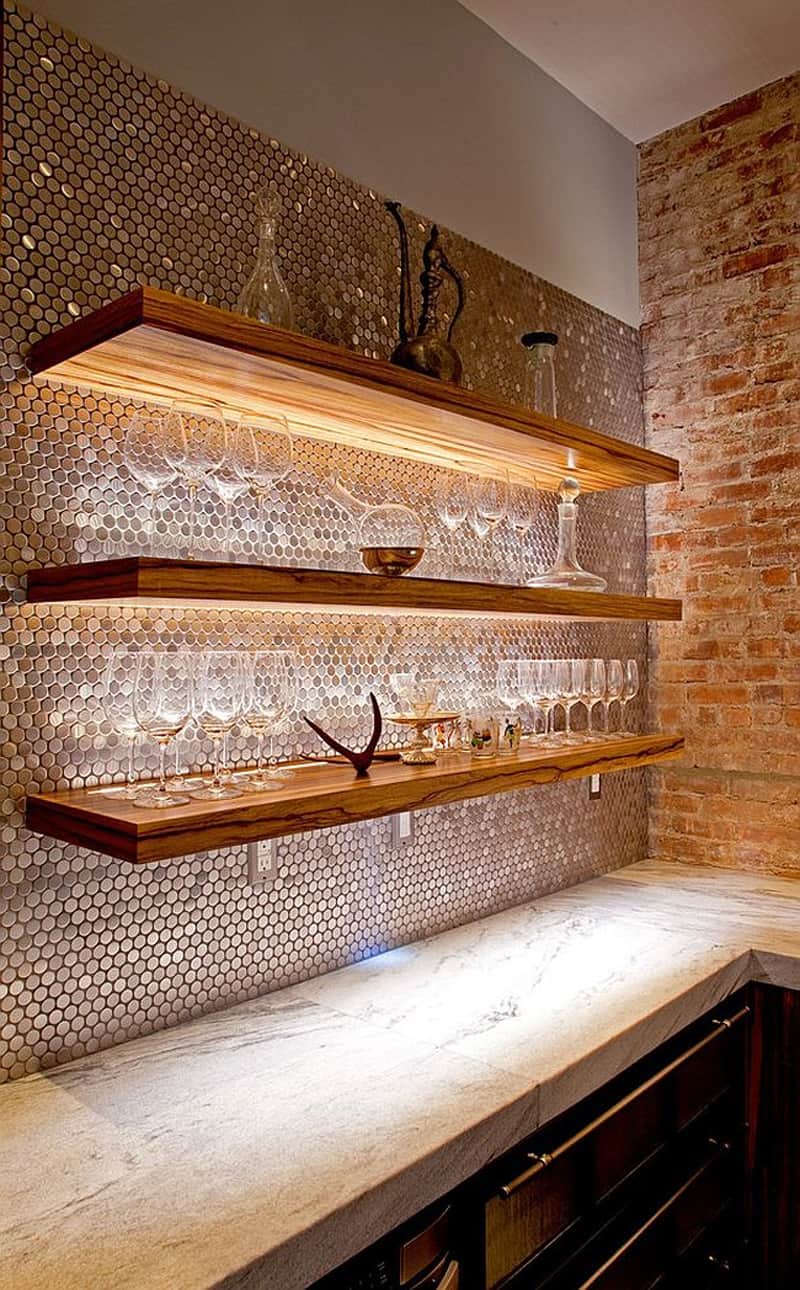

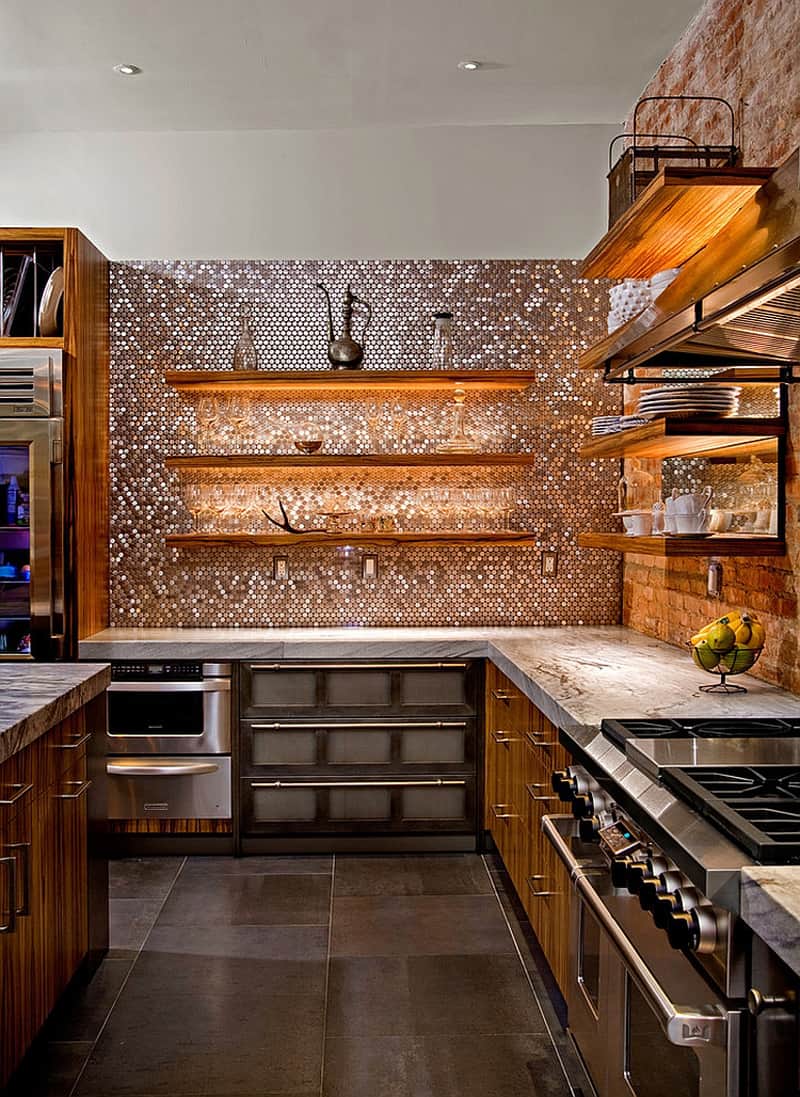

These sparkling penny round tiles make a gorgeous statement in this kitchen, especially paired with exposed brick and floating shelves. A metallic penny tile backsplash reflects the LED lights mounted under the shelves. It also complements the steel cabinetry pieces and steel appliances. [photo source].

The glass, chrome, and marble mosaic backsplash in this kitchen is dainty and perfect next to the sturdy nature of the Super White Quartzite slab on the island.[photo source]


